Lab 3 – Connecting Posit Workbench to your Identity Provider
By the end of this lab, you will be able to:
- Configure Workbench to use OpenID Connect (OIDC) for authentication
- Set up client credentials and authentication settings for your identity provider
- Configure Just-in-Time (JIT) provisioning to automatically create user accounts
- Verify that single-sign-on authentication is working correctly
- Troubleshoot common authentication issues using Workbench logs
1 Introduction
Until now, Workbench was relying on Linux account credentials for authentication. During this lab, you will configure Workbench to use an external service to handle authentication. There are several solutions to do this, and here, you will use the OpenID Connect (OIDC) authentication protocol. While OIDC extends the OAuth 2.0 protocol with identity information, in practice, the terms OAuth and OIDC are often used interchangeably.
OIDC is a single-sign-on (SSO) protocol that helps you centralize user authentication and authorization across your organization’s applications. By integrating OIDC with Workbench (or other Posit products), users authenticate with their existing credentials, eliminating the need for separate usernames and passwords while maintaining security through industry-standard authentication flows.
In this lab, you will set up Workbench to use single-sign-on with the OIDC protocol and configure JIT provisioning to automatically create user accounts on first login.
When integrating an Identity Provider (IdP) with Workbench, you configure two distinct components:
- Authentication settings: Allow Workbench and the IdP to share information during the login flow about the identity of the user logging in
- Authorization settings: Determine the role and permission level the user will have in Workbench
If your infrastructure uses a different authentication system, refer to the Admin Guide for specific configuration steps.
- Reading time: 15 minutes
- Documentation reading time: 25-45 minutes
- Hands-on exercise time: 15-30 minutes
Integrating Workbench with your organization’s identity provider is critical for several reasons:
- Security: Centralized authentication reduces password sprawl and enforces consistent security policies (MFA, password complexity, rotation)
- User Management: Adding and removing users is managed in one place (your IdP), not separately in each application
- Compliance: Many organizations require centralized authentication for audit trails and access control
- User Experience: Single sign-on eliminates the need for separate credentials, improving user adoption
- Automation: Automated user provisioning (JIT or SCIM) reduces manual account management overhead
2 Configure Workbench to use OIDC
To use the OIDC protocol with Workbench, obtain the following values:
- the OpenID URL
- the Client ID
- the Client Secret
The OIDC client you will use in this lab is configured to use:
https://<your-idp-url>/realms/tisop-realmas the OpenID URLtisop-oidc-clientas the client IDyoTSR3UoZn2qYXXwyHKW422OBpWY4yM5as the client Secret
The URL for your identity provider in this training environment, is available in the bottom right pane of the Instruqt interface, or you can use the following command to get it:
Terminal
echo https://workbench-oauth-vm-8443-$_SANDBOX_ID.env.play.instruqt.comFollow these steps to configure Workbench for OIDC authentication:
Create the
/etc/rstudio/openid-client-secretfileCreate the
/etc/rstudio/openid-client-secretfile with the following content:/etc/rstudio/openid-client-secret
client-id=tisop-oidc-client
client-secret=yoTSR3UoZn2qYXXwyHKW422OBpWY4yM5
Set the appropriate ownership and permissions for this file:
Terminal
sudo chown rstudio-server:rstudio-server /etc/rstudio/openid-client-secret
sudo chmod 600 /etc/rstudio/openid-client-secret
Edit
/etc/rstudio/rserver.confEdit the
/etc/rstudio/rserver.conffile by adding the following:/etc/rstudio/rserver.conf
auth-openid=1
auth-openid-issuer=https://<your-idp-url>/realms/tisop-realm
Replace
<your-idp-url>with your actual identity provider URL.Restart Workbench
Restart Workbench using the proper restart sequence:
Terminal
sudo /usr/sbin/rstudio-server stop && \
sudo /usr/bin/rstudio-launcher stop && \
sudo /usr/bin/rstudio-launcher start && \
sudo /usr/sbin/rstudio-server start
If you try to log in at this point, you will see an error message (“Unauthorized User”). The authentication flow is working, but the user account does not exist on the system, and therefore the login fails. To fix this, you can either create the user accounts in advance, use SCIM, or enable JIT provisioning to automatically create the user accounts when they log in for the first time. The next section covers JIT provisioning. Depending on your environment and requirements, SCIM might be a better option. Refer to the Admin Guide for SCIM configuration steps.
Some parameters in your Workbench configuration files might be sensitive, such as the client secret needed for the authentication flow with OIDC. For the purpose of this lab, we keep it in plain text, but in production environments, this secret must be encrypted.
Workbench provides the encrypt-password utility that allows you to encrypt sensitive values. To use it, run:
Terminal
sudo rstudio-server encrypt-passwordIt will prompt you for the value you want to encode. You can then use the output directly in your configuration file.
If you encounter any issues, the logs might include helpful information. For instance, to inspect the last 100 lines of the Workbench log:
Terminal
sudo tail -100 /var/log/rstudio/rstudio-server/rserver.logWorkbench is designed to provide an individualized computing environment to each user. Users own the processes they initiate and run from Workbench, which requires local or networked system accounts.
In contrast, Posit Connect relies on a single system account (service account) to run most content, with users stored in an internal database. This architectural difference means Workbench has different user provisioning requirements than Connect.
Workbench relies heavily on the Linux Pluggable Authentication Module (PAM) to manage authentication. PAM can be used by itself for authentication (e.g., using local accounts, LDAP, Kerberos), or to automatically provision local system accounts when using single-sign-on or proxied authentication.
3 Enable Just-in-Time User Provisioning
A full guide is available in Implementing JIT Provisioning. To enable JIT for this lab, follow these steps. If you use a RHEL-based Linux distribution, the steps will be slightly different; refer to the guide linked above for more details.
When relying on external identity providers, you can use two approaches to create local Linux users and groups on your Workbench server:
SCIM (System for Cross-domain Identity Management): The IdP continuously synchronizes user and group information to the Workbench server. Users only count toward the license limit when they log in for the first time.
JIT: Local Linux accounts are created only when a user logs in for the first time.
3.1 Enable User Provisioning in Workbench
You will need to enable three settings in your /etc/rstudio/rserver.conf file:
/etc/rstudio/rserver.conf
# Add the following lines
user-provisioning-enabled=1
user-provisioning-register-on-first-login=1

# Enable PAM sessions (should already be present, but verify in your own environment)
auth-pam-sessions-enabled=1
3.2 Configure the Home Directory Creation
Before starting a Workbench session on behalf of a user, Workbench verifies that the user has a home directory. To create it, Workbench relies on PAM modules. You can use the pam_mkhomedir module to automatically create a home directory for the user when they log in for the first time. (It is named oddjob-mkhomedir in RHEL-based Linux distributions).
Terminal
# Install the PAM mkhomedir module
sudo apt install -y libpam-modules

# Edit the PAM configuration to add a line to automatically create user home directories in common-session
echo "session required pam_mkhomedir.so skel=/etc/skel/ umask=0022" | sudo tee -a /etc/pam.d/common-session
3.3 Restart Workbench
Now that you configured the necessary settings for JIT provisioning, restart Workbench to apply the changes:
Terminal
sudo /usr/sbin/rstudio-server stop && \
sudo /usr/bin/rstudio-launcher stop && \
sudo /usr/bin/rstudio-launcher start && \
sudo /usr/sbin/rstudio-server startDepending on your specific environment and requirements, you might need to perform additional configuration steps that are described in the guide mentioned above, such as configuring the NSS module (it should be done automatically in recent versions of Workbench), or disabling NSCD caching (if it is something you are using in your environment).
4 Verify Authentication and Provisioning
The identity provider we use for this lab contains the following users and their associated groups:
| Group | Username |
|---|---|
| data-science-leadership | elena.rodriguez |
| data-science-leadership | michael.zhang |
| data-science-leadership | sarah.thompson |
| senior-analysts | david.patel |
| senior-analysts | jennifer.kim |
| senior-analysts | robert.chen |
| data-engineers | priya.gupta |
| data-engineers | marcus.johnson |
| data-engineers | olivia.clark |
| analytics-team | jason.nguyen |
| analytics-team | sophia.garcia |
| analytics-team | thomas.wong |
| analytics-team | aisha.mohammed |
For this lab, each user’s password is the same as their username. For example, user elena.rodriguez has the password elena.rodriguez.
To check that everything is working as expected:
Navigate to the Workbench login screen (click the “Posit Workbench” tab)
Log in as any one of the users listed in the table above. For instance, use
elena.rodriguez(both as the user name and the password)Once you are logged in, the Workbench launch screen appears:
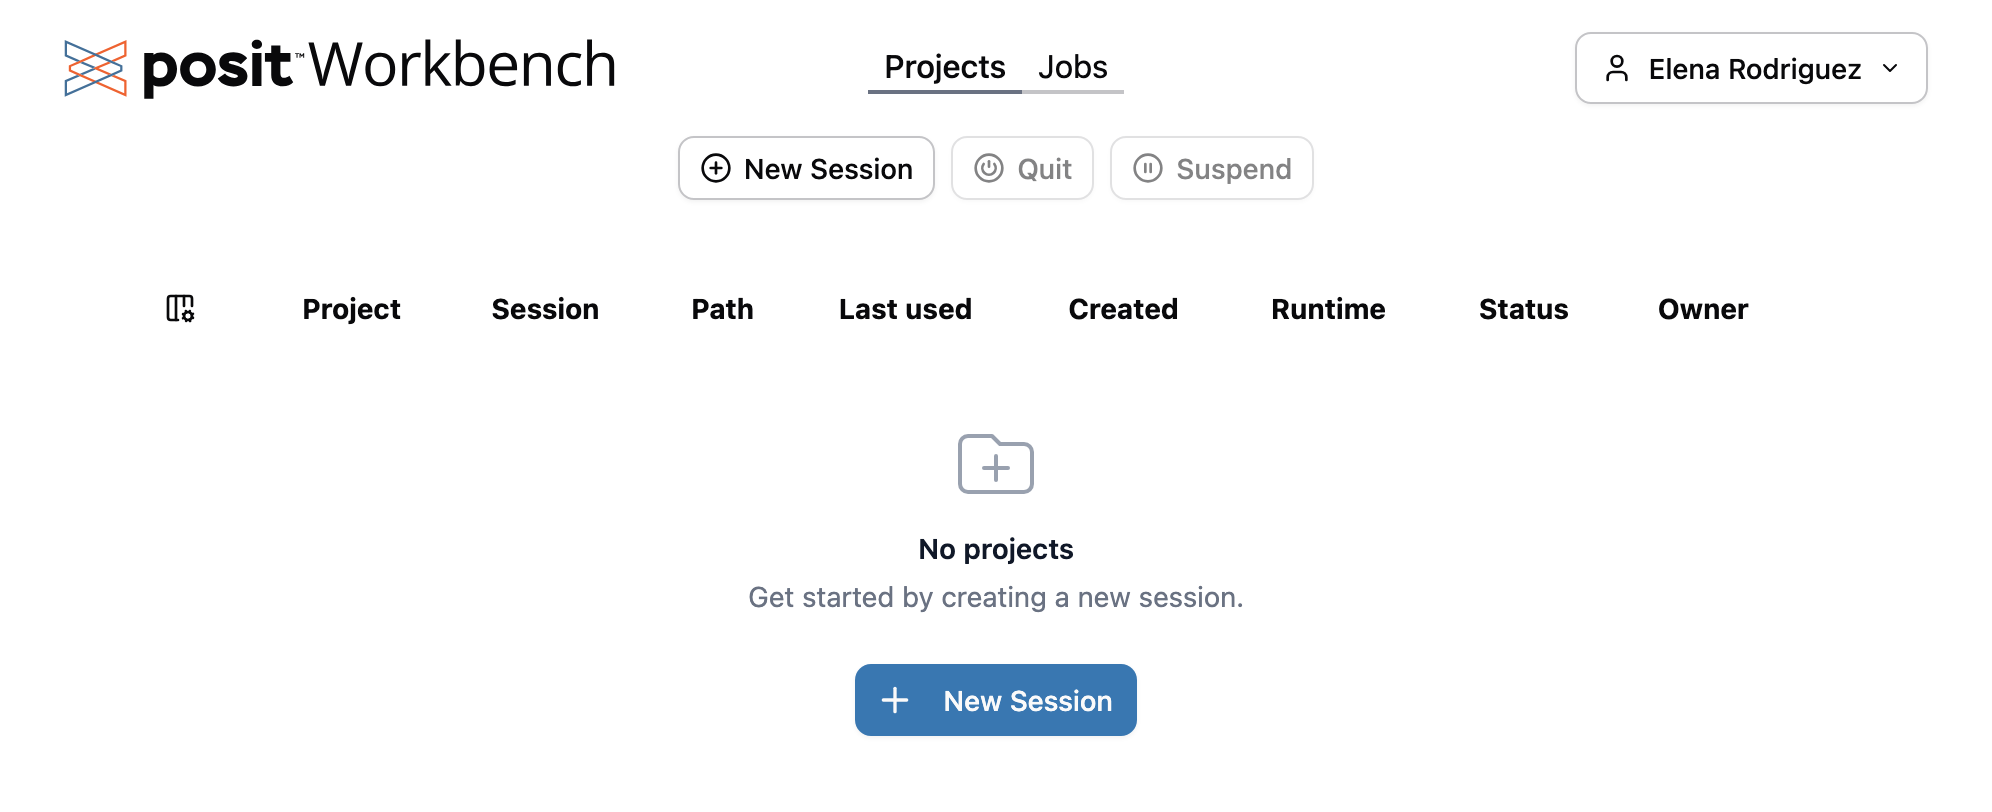
Workbench launch screen
Because the authentication part is handled outside of Workbench by the IdP, when you click “Log Out” in Workbench, you do not log out from the session started by your Identity Provider.
To fully log out:
- Visit
https://<your-idp-url>/realms/tisop-realm/protocol/openid-connect/logout, and confirm that you want to log out - Click “Log Out” in Workbench
When you click “Log In” again in Workbench, you should be prompted for a user name and password. You can log back in using any of the users listed in the table above.
Note that, in your environment, the URL to use to log out and the exact steps to log out will be different depending on the identity provider you are using. Refer to your IdP documentation for more information.
5 Check Your Understanding
What are the two main components you need to configure when integrating Workbench with an identity provider?
Why does Posit Workbench require local system accounts for each user, while Posit Connect does not?
What is the difference between SCIM and JIT provisioning?
Authentication settings (to verify user identity during login) and authorization settings (to determine user roles and permissions in Workbench).
Workbench provides individualized computing environments where users own the processes they initiate, requiring local or networked system accounts. Connect uses a single service account to run content, storing users in an internal database.
SCIM continuously synchronizes user and group information from the IdP to Workbench, while JIT only creates local Linux accounts when a user logs in for the first time. Both methods only count users toward the license limit upon first login.
As you prepare to configure authentication for your production Workbench environment, consider these questions:
- IdP Integration Details: Where will you obtain the information needed to integrate your authentication system with Workbench? (OpenID URL, Client ID, Client Secret, or equivalent for your authentication method)
- User Provisioning Strategy: Will you use JIT or SCIM provisioning to create local Linux accounts? What are the trade-offs for your environment?
- Group Mapping: How will you map IdP groups to Workbench permissions? What roles and access levels do different teams need?
- Testing Strategy: How will you test authentication changes without disrupting current users? Consider using a separate test instance.
- Fallback Authentication: What happens if your IdP becomes unavailable? Do you need a backup authentication method?
Document these decisions and share them with your security and identity management teams before implementation.