Lab 4 – Setting up Authentication
By the end of this lab, you will be able to:
- Configure Connect to authenticate users against an OIDC identity provider
- Map identity provider groups to Connect roles
- Verify that users receive the expected role when they log in
This lab puts into practice the concepts covered in Integrating Connect with Your Authentication System. If you have not read it yet, review it first so the steps below make sense.
Up until now, Connect was managing authentication itself by relying on user names and passwords. During this lab, we will configure Posit Connect to use an external service for authentication. There are several solutions to do this, and here, we will use the OpenID Connect (OIDC) Authentication protocol. While OIDC extends the OAuth 2.0 protocol with identity information, in practice, the terms OAuth and OIDC are often used interchangeably.
OIDC is a single sign-on protocol that helps you centralize user authentication and authorization across your organization’s applications. By integrating OIDC with Connect (or other Posit products), users authenticate with their existing credentials instead of separate usernames and passwords, and the login flow follows industry standards. If your infrastructure uses a different type of authentication system, refer to the Admin Guide to check the exact steps you will need to take.
To integrate the IdP you use with Connect, there are two things you need to configure, the authentication settings (they check the identity of the user) and the authorization settings (they determine the level of access of the user):
- the authentication settings allow Connect and the IdP to share information during the login flow about the identity of the user logging in;
- the authorization settings will determine the role in Connect the user will assume and therefore their permission level.
- Reading time: 15 minutes
- Documentation reading time: 25-45 minutes
- Hands-on exercise time: 15-30 minutes
User Roles
Before diving into the configuration settings, it is important to have a good understanding of the roles users can have in Connect.
- Based on your reading on the documentation, what are the three roles that logged in users can have?
Configuring the Identity Provider
To use OAuth2 for authentication, you will need to edit the configuration file for Connect (/etc/rstudio-connect/rstudio-connect.gcfg):
- In the
[Authentication]section, change theProvidersetting frompasswordtooauth2. - Create a new section,
[OAuth2]and specify values for theOpenIDConnectIssuer, theClientId, and theClientSecret. Additionally, you will set bothRequireUsernameClaimandLoggingtotrue. The first setting ensures that Connect always relies on the Identity Provider to get the user name (something that the IdP used in this lab does), and the second setting provides more verbose logging which is helpful for troubleshooting. To get the URL of the identity provider for this lab, you can copy it from the bottom right panel of the Instruqt interface, or you can use the command:
Terminal
echo https://auth-vm.$_SANDBOX_ID.instruqt.ioYour configuration file should look like this:
[Authentication]
Provider = "oauth2"

[OAuth2]
OpenIDConnectIssuer = "<your-idp-url>/realms/tisop-realm"
ClientId = "tisop-oidc-client"
ClientSecret = "yoTSR3UoZn2qYXXwyHKW422OBpWY4yM5"
RequireUsernameClaim = true
Logging = trueSome parameters in your Connect configuration file might be sensitive, such as the client secret needed for the authentication flow with OIDC. These parameters can be encrypted using the rscadmin command line utility that is installed with Connect.
The encryption process uses a key that is, by default, generated and managed by your Connect installation. The Admin Guide has more information about this encryption key and how you can manage it.
If you want to encrypt the client secret, you can use the following command, piping the secret to the command line utility:
echo yoTSR3UoZn2qYXXwyHKW422OBpWY4yM5 | sudo /opt/rstudio-connect/bin/rscadmin encrypt-config-value Mapping groups to roles
To facilitate user management and determine their role in Connect, you can configure Connect to automatically map user roles based on the group information included in the OIDC claim.
The identity provider we use for this lab contains the following users and their associated groups:
| Group | Username/Password |
|---|---|
| data-science-leadership | elena.rodriguez |
| data-science-leadership | michael.zhang |
| data-science-leadership | sarah.thompson |
| senior-analysts | david.patel |
| senior-analysts | jennifer.kim |
| senior-analysts | robert.chen |
| data-engineers | priya.gupta |
| data-engineers | marcus.johnson |
| data-engineers | olivia.clark |
| analytics-team | jason.nguyen |
| analytics-team | sophia.garcia |
| analytics-team | thomas.wong |
| analytics-team | aisha.mohammed |
We want to configure Connect so that users in the data-science-leadership and senior-analysts groups become “Administrators” in Connect, and users in the analytics-team group become “Publishers”. Everyone else will be a “Viewer”. Based on your reading of the documentation, write up the configuration needed to enable this mapping.
To configure the user role mapping, we need to add the [Authorization] section to the configuration file:
[Authorization]
UserRoleGroupMapping = true
AdministratorRoleMapping = "data-science-leadership"
AdministratorRoleMapping = "senior-analysts"
PublisherRoleMapping = "analytics-team"
Groups that are not listed in the configuration file will have the role “Viewer”. Therefore, the groups research-interns and data-engineers do not need to be listed here. Note that you can use the setting Authorization.DefaultUserRole to specify the role unlisted groups will be given.
Checking that everything is working
Now that all the settings are in place to integrate the identity provider with Connect, let’s check that everything is working as expected.
- Restart Connect
sudo systemctl restart rstudio-connect.service. - Navigate to the ‘Posit Connect’ tab, click on the circular arrow to refresh the page, and click on “Log in”.
- Log in as the first user in the table above, using
elena.rodriguezas both the user name and the password. - Navigate to the “People” entry in the top navigation bar. You should see a single user,
elena.rodriguezwith the “Administrator” role.
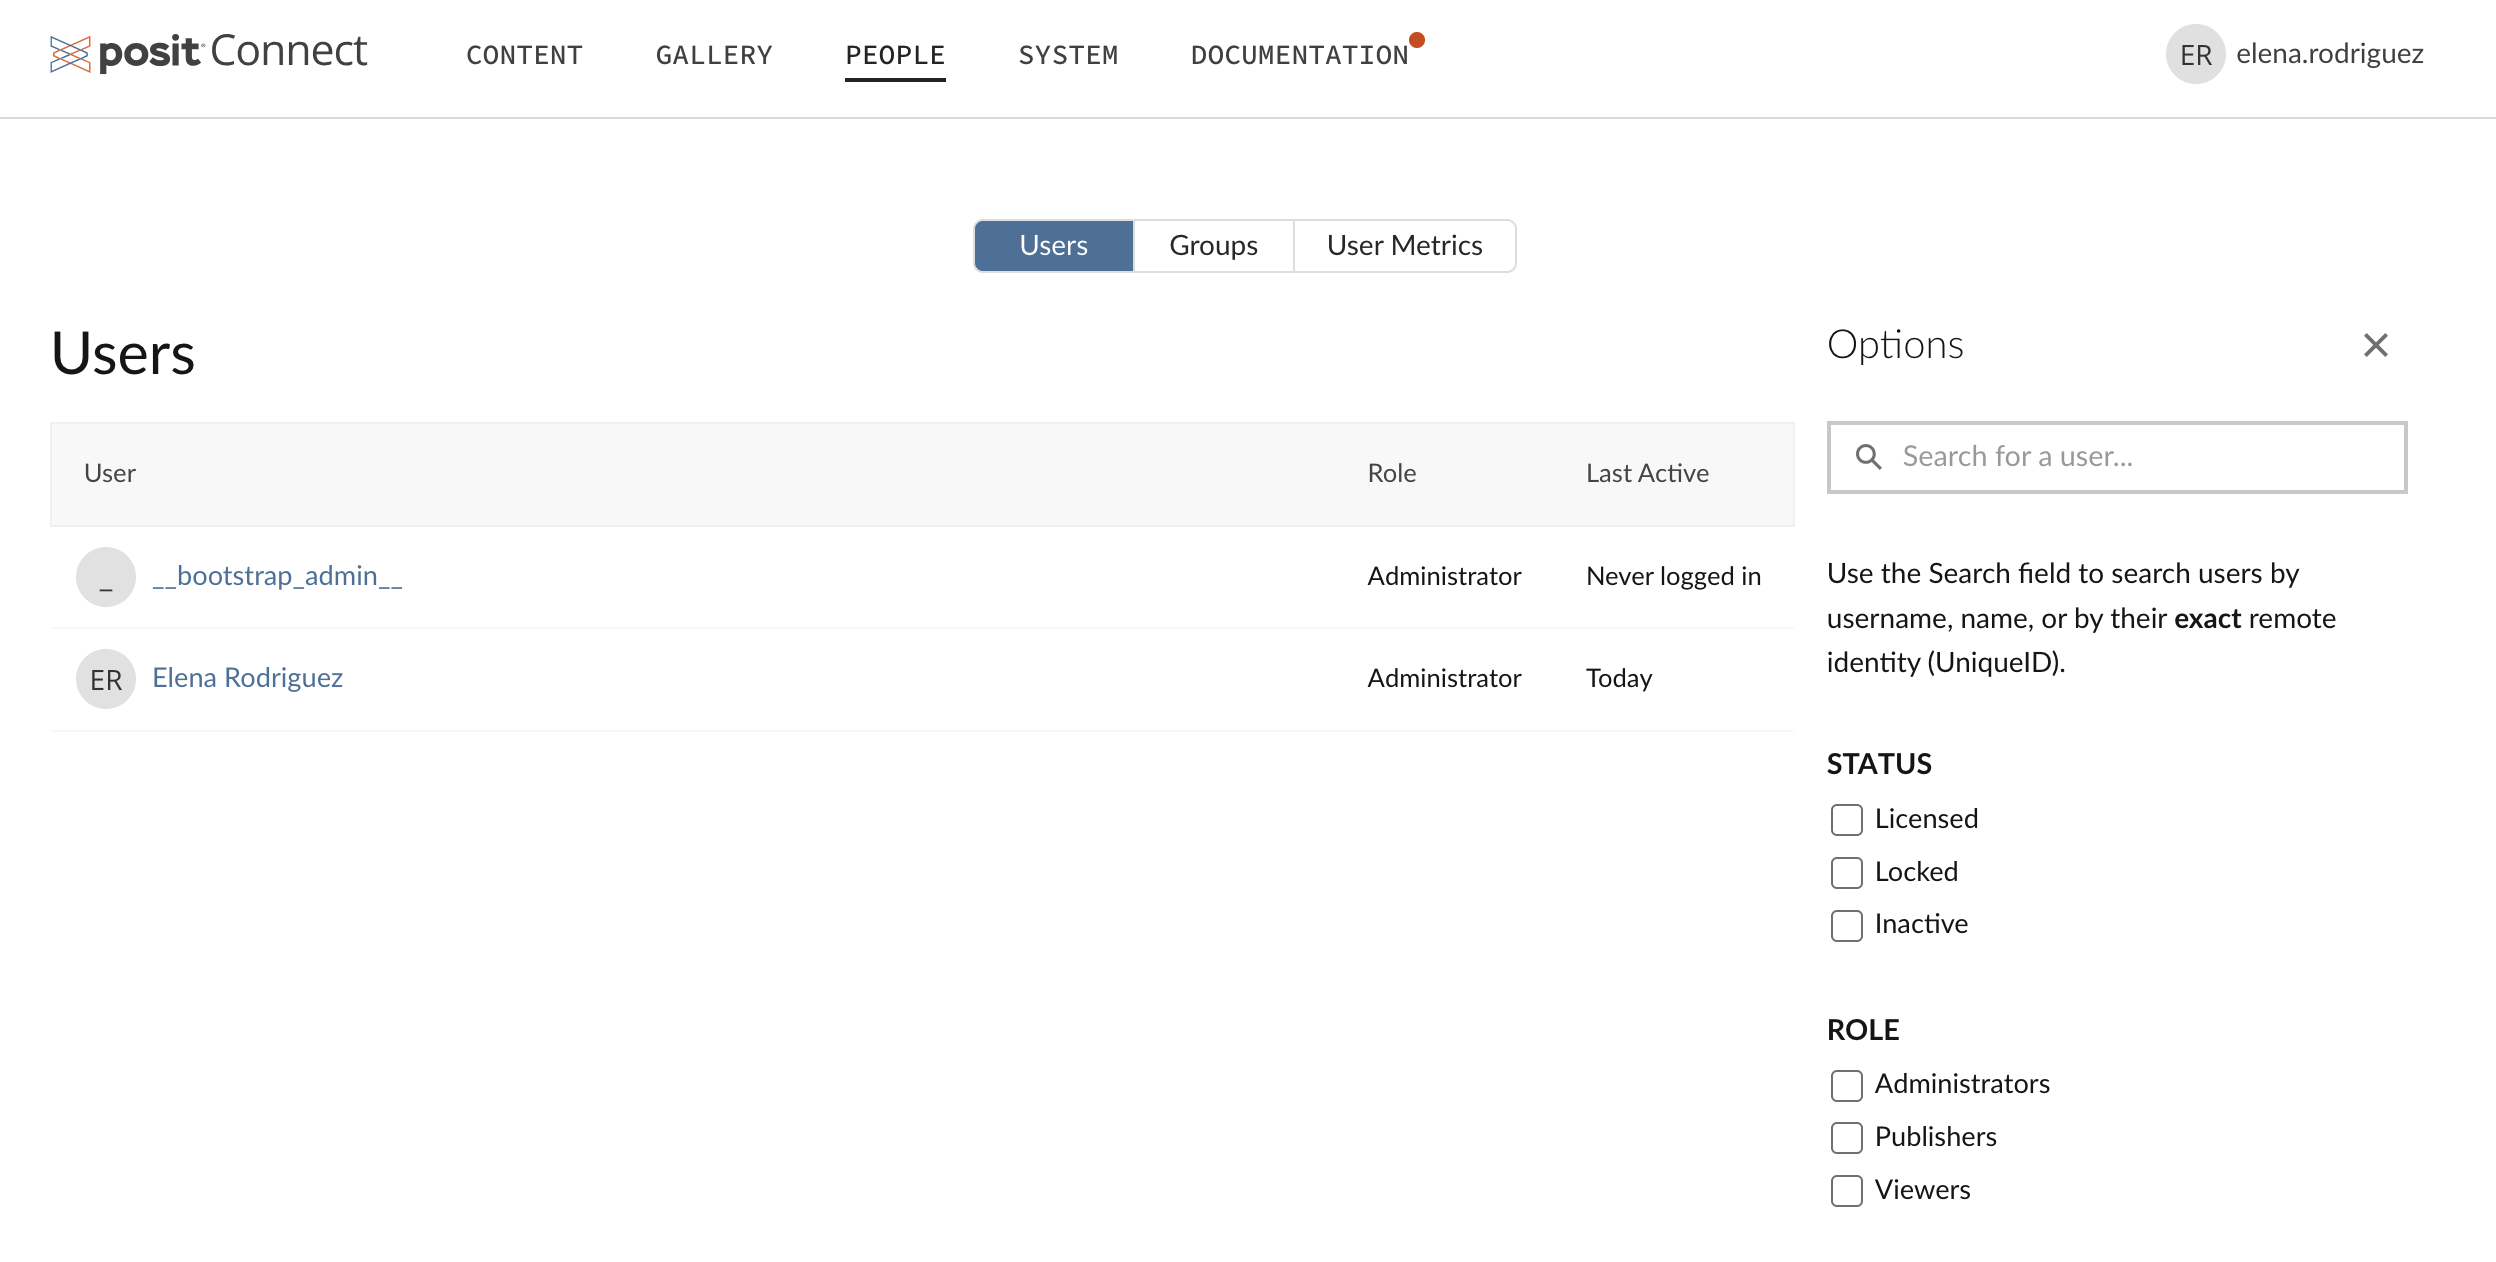
Note that by default, Connect is configured to create users on first log in (this is called “just in time provisioning”). Even though the identity provider knows about other users, they will not exist in Connect before they log in. For this lab, if you want to create additional users, the easiest way is to use private browsing or a different browser to open the URL of your Connect instance and log in using any of the users listed in the table above (the passwords are the same as the user names).
Because the authentication part is handled outside of Connect by the Identity Provider service, when you click on “Log Out” in Connect, you do not log out from the session started by your Identity Provider. To fully log out, you also need to log out the user from the identity provider.
Note that these steps only work when you visit your instance URL (not the tab in Instruqt). It is not possible to fully log out from Connect in a session started within the Instruqt tab.
- Visit
https://<your-idp-url>/realms/tisop-realm/protocol/openid-connect/logout, and confirm that you want to log out - Click on “Log Out” in Connect.
When you click on “Log In” again in Connect, you should be prompted for a user name and password. You can log back in using any of the users listed in the table above.
You can click the “Check” button to verify that you completed all the steps for this lab.
Troubleshooting
If you encounter any issues, the Connect logs might include information to help you troubleshoot. For instance, to inspect the last 100 lines of the log:
sudo tail -100 /var/log/rstudio/rstudio-connect/rstudio-connect.log Check your understanding
After completing this lab, you should be able to answer the following questions:
Authentication vs Authorization: What is the difference between authentication and authorization in the context of Posit Connect?
Role Mapping Configuration: If you wanted to configure Connect so that users in the group “data-managers” become Publishers and users in “executive-team” become Administrators, what configuration sections and settings would you need to add to the Connect configuration file?
Troubleshooting OIDC: You’ve configured OIDC authentication but users are unable to log in. What are specific steps you could take to diagnose and troubleshoot this issue?
Authentication verifies who the user is. It confirms their identity through credentials like usernames/passwords or external identity providers (like OIDC). In Posit Connect, authentication determines whether a user can access the system at all. Authorization determines what the authenticated user can do. It controls their permissions and access levels within Connect. Authorization assigns roles (Administrator, Publisher, Viewer) that define what actions users can perform.
To configure Connect so that “data-managers” become Publishers and “executive-team” become Administrators, you would need to add the following to the
[Authorization]section:AdministratorRoleMapping = "executive-team" PublisherRoleMapping = "data-managers"If users cannot log in after configuring OIDC authentication, following these steps might help diagnose the issue:
- Check that the configuration values are correct:
- Confirm
OpenIDConnectIssuerURL is correct and accessible from the Connect instance - Check
ClientIdandClientSecretmatch the identity provider settings.
- Confirm
- Enable verbose logging by adding
Logging = trueto the[OAuth2]section, and restart the Connect service. - Check the logs with
sudo tail -100 /var/log/rstudio/rstudio-connect/rstudio-connect.log - Check user claims: verify the identity provider is sending the expected user information (especially if
RequireUsernameClaim = true).
- Check that the configuration values are correct:
Looking back, Planning ahead
This lab only covers the basics of integrating Connect with authentication systems and of user management. The documentation provides more information on how to integrate with other systems, and how to manually or automatically map attributes from your authentication system to the roles available in Connect.
As you plan the installation of Connect on your own infrastructure:
- Do you know where you will be able to get the information you need to integrate your authentication system with Posit Connect? (e.g., Client URL, ID, and Secret for OIDC)
- How are you going to decide the Connect roles users will have in your organization?